


Installing a plumbers test pump is a crucial skill for plumbing professionals and DIY enthusiasts alike. As a leading supplier of high-quality plumbers test pumps, I understand the importance of ensuring accurate and reliable pressure testing in plumbing systems. In this blog post, I will guide you through the step-by-step process of installing a plumbers test pump, providing you with the knowledge and confidence to carry out this task effectively.
Understanding the Plumbers Test Pump
Before we dive into the installation process, let's take a moment to understand what a plumbers test pump is and why it is essential. A plumbers test pump is a device used to pressurize a plumbing system to check for leaks and ensure its integrity. It forces water or another testing medium through the pipes at a specific pressure, allowing you to identify any leaks or weaknesses in the system.

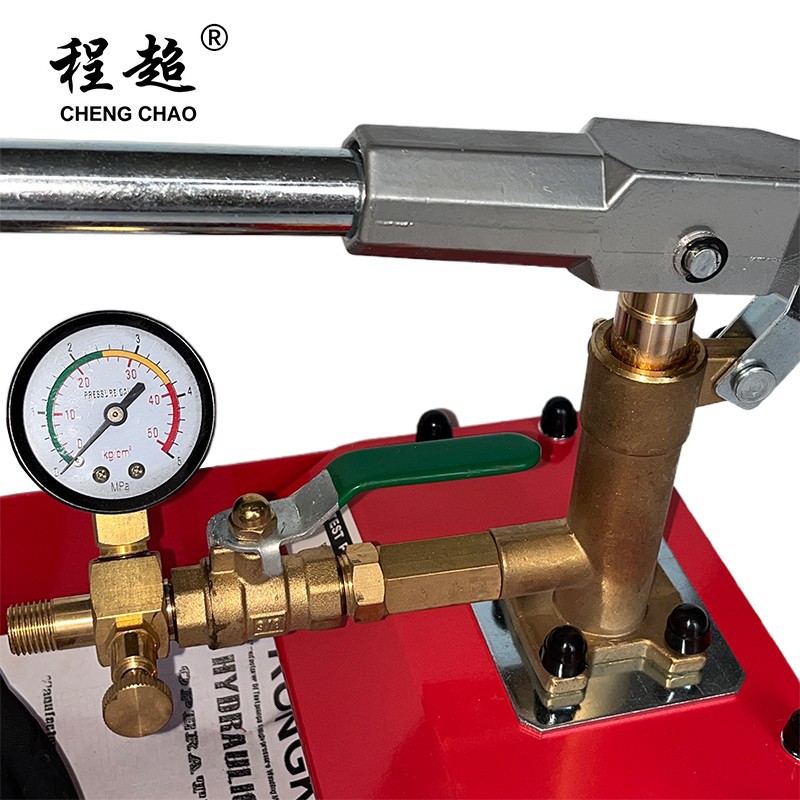
As a supplier, we offer a wide range of plumbers test pumps to suit different applications and requirements. For example, our 50 Bar Pressure Test Pump is ideal for high-pressure testing, while the 70Psi Water Pressure Test Pump is suitable for medium-pressure applications. We also have the 25 Psi Water Test Pump for low-pressure testing.
Step 1: Gather the Necessary Tools and Materials
Before you begin the installation process, make sure you have all the necessary tools and materials on hand. Here's a list of items you'll need:
- Plumbers test pump
- Appropriate hoses and fittings
- Wrenches
- Sealant tape
- Safety goggles
- Gloves
Step 2: Prepare the Plumbing System
The first step in installing a plumbers test pump is to prepare the plumbing system for testing. This involves shutting off the main water supply to the system and draining any existing water from the pipes. Make sure all faucets, valves, and appliances are turned off to prevent water from flowing back into the system during testing.
Step 3: Connect the Test Pump
Once the plumbing system is prepared, it's time to connect the test pump. Start by attaching the appropriate hoses to the test pump and the plumbing system. Use wrenches to tighten the fittings securely, ensuring a leak-free connection. Apply sealant tape to the threads of the fittings to prevent any leaks.
Step 4: Prime the Test Pump
Before you can start pressurizing the system, you need to prime the test pump. This involves filling the pump with water or the testing medium to remove any air from the system. Follow the manufacturer's instructions to prime the pump correctly.
Step 5: Pressurize the System
Once the test pump is primed, you can start pressurizing the plumbing system. Slowly operate the pump to increase the pressure to the desired level. Refer to the manufacturer's instructions for the recommended pressure for your specific testing requirements.
Step 6: Check for Leaks
Once the system is pressurized, carefully inspect the pipes, fittings, and connections for any signs of leaks. Look for water droplets, damp spots, or hissing sounds, which may indicate a leak. If you detect a leak, mark the location and make the necessary repairs.
Step 7: Monitor the Pressure
After pressurizing the system and checking for leaks, it's important to monitor the pressure for a specific period. This will help you determine if there are any hidden leaks or if the system is holding the pressure as expected. Keep an eye on the pressure gauge and record the pressure readings at regular intervals.
Step 8: Release the Pressure and Disconnect the Test Pump
Once the testing is complete and you are satisfied with the results, it's time to release the pressure and disconnect the test pump. Slowly open the pressure relief valve on the test pump to release the pressure from the system. Once the pressure is fully released, disconnect the hoses and fittings from the plumbing system and the test pump.
Step 9: Restore the Plumbing System
After disconnecting the test pump, you can restore the plumbing system to its normal operation. Turn on the main water supply and open all the faucets and valves to allow water to flow through the system. Check for any remaining leaks and make any necessary adjustments.
Conclusion
Installing a plumbers test pump is a straightforward process that can be easily accomplished with the right tools and knowledge. By following the steps outlined in this blog post, you can ensure a successful pressure test of your plumbing system.
As a trusted supplier of plumbers test pumps, we are committed to providing you with high-quality products and excellent customer service. If you have any questions or need further assistance with installing a plumbers test pump or choosing the right pump for your needs, please don't hesitate to contact us. We're here to help you with your procurement and answer any technical queries you might have. Reach out to us, and let's discuss how our products can meet your plumbing testing requirements.
References
- Plumbing Handbook: A Comprehensive Guide to Plumbing Systems and Installation
- Manufacturer's Instructions for Plumbers Test Pumps